


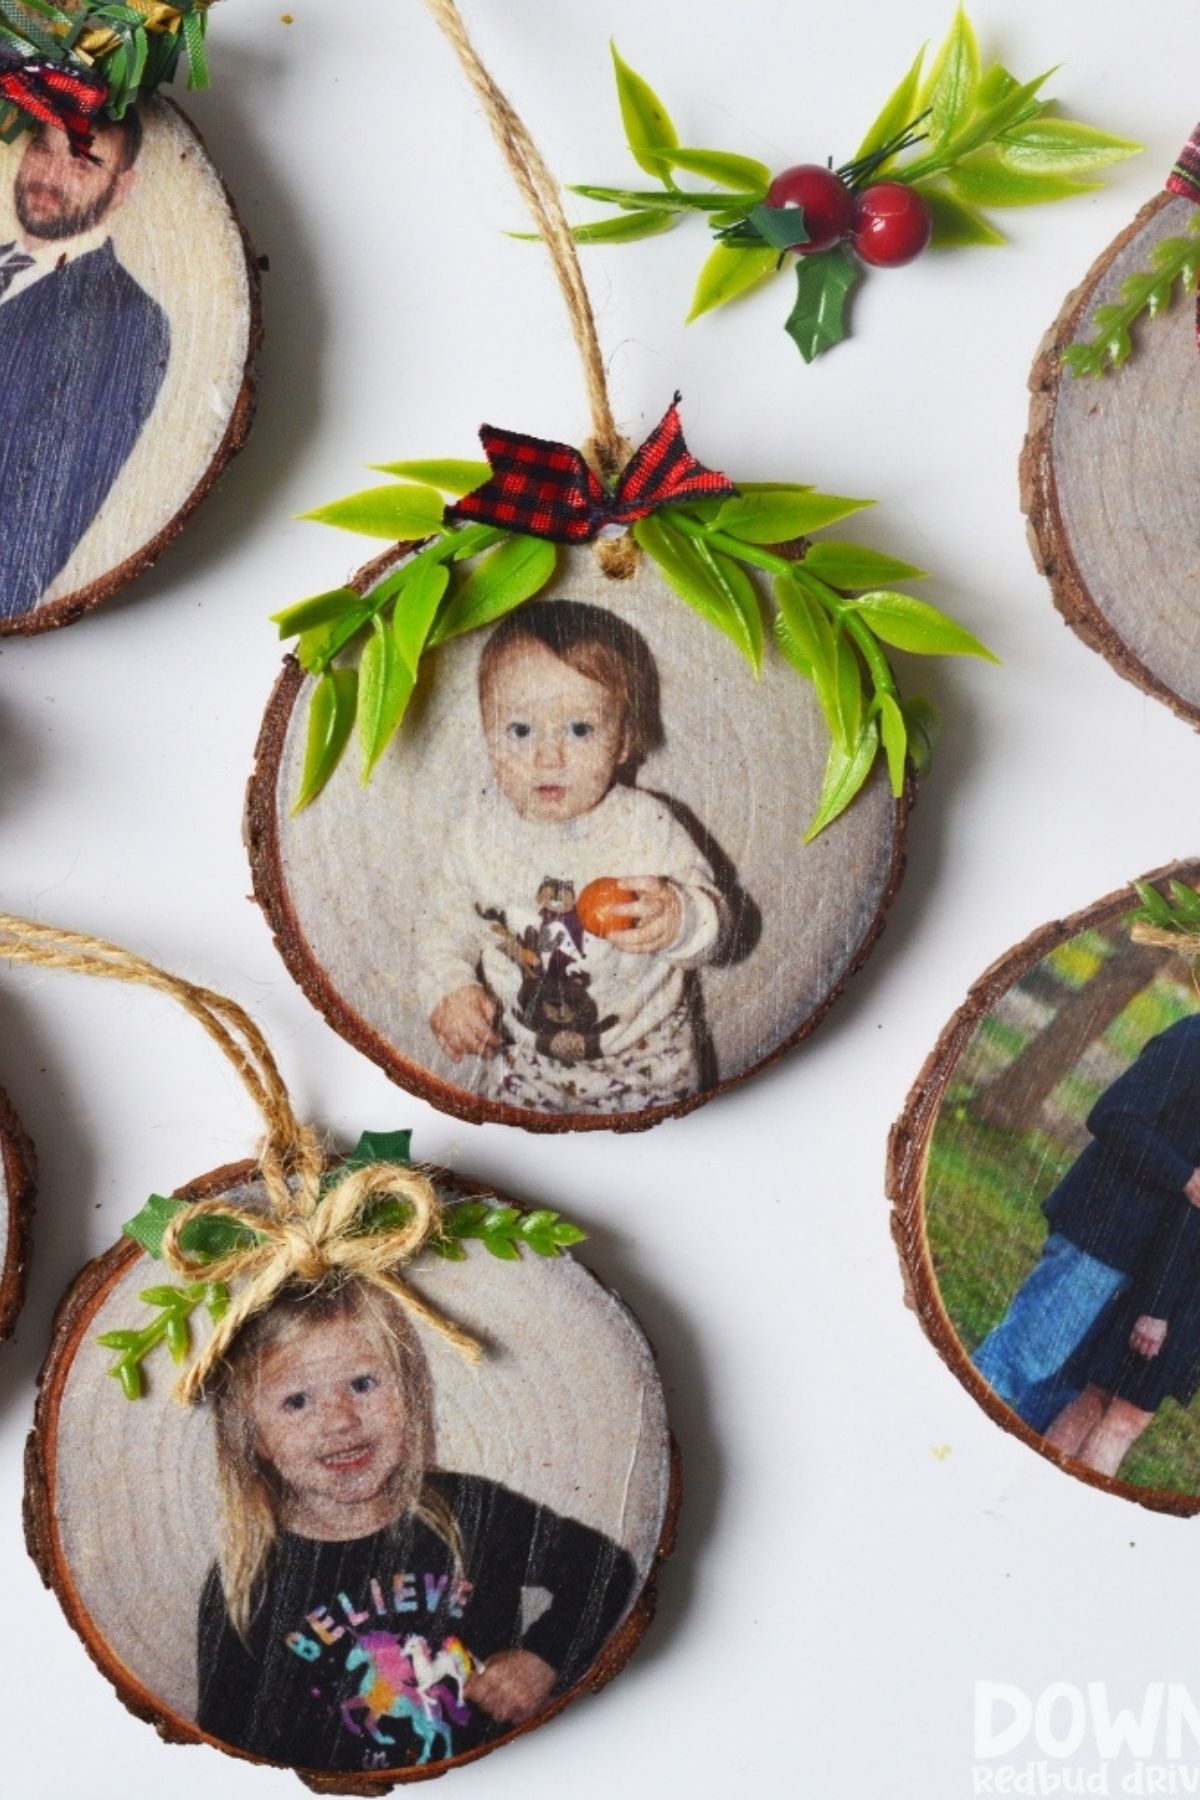
Make these easy DIY Wood Photo Ornaments for yourself or your family this year… they are SUPER simple! This process is so easy, and you will love how quickly this Christmas craft comes together! They’re the perfect way to store Christmas memories!
I recently had a friend who loved my Napkin Ornaments and wanted me to use the same method to make custom ornaments for him. Except, I had no idea how I was going to do that!
So I set to experimenting and was able to find a TOTALLY viable method that works and is not only simple but is affordable and works really well.
DIY Wood Photo Ornaments
These easy DIY Christmas ornaments come together really quickly, and I’ll walk you through how to make them below!
If you like this method, you’d also like how I made my Napkin Pumpkins (adorable DIY Fall Home Decor!). I also used these same wood slices to make super cute Snowman Ornaments and they turned out great!
Step 1: Gather your supplies.

You will need:
- Wood Slice Ornaments
- Cardstock
- White Tissue Paper
- Template to Print Pictures (you can use this one I made on Canva – see instructions on how to use it below)
- Tape
- Mod Podge
- Foam Paint Brush
- Scissors
- Toothpick
- Hot Glue Gun
- Greenery and Ribbon for Decoration (optional)
Step 2: Format your photos for printing.
I figured out I needed my pictures to be cropped to about a 2.75″ circle. The easiest way for me to do this for printing was to use a template in Canva.
Here’s a link to the one I used, and you can use it. Just click the link, then click edit design.
If you do not have a Canva account, you will be prompted to make one. Create your free account, then it will open the design. Then you can edit the copy and upload your photos.
Upload your pictures and drop them in the circles on the page.
SAVE your document to your computer as a PDF FOR PRINT. This will maintain the correct sizing you formatted.
Step 3: Print the pictures.

In order to print these so this DIY Wood Photo Ornament project works, you will need to take a couple steps before printing.
Cut out a sheet of WHITE tissue paper slightly smaller than your 8.5″x11″ cardstock paper. Make sure it is smoothed completely flat (iron if you need to) and then use scotch tape to tape it to the sheet of cardstock.
Cardstock paper is found at any office supply store or even at Walmart. It’s cheap and easy to come by.
Tape the tissue paper to the cardstock with the matte side up. This will look best when put onto your wood slice ornament blanks.
Pro Tip: Tape all the way around the outside of the tissue paper to keep the printer from grabbing and tearing the paper while printing.

Print out your sheet(s) with the tissue paper side up, so the photos print onto the tissue paper.
When they print they will look like this. Laser Jet or Ink Jet doesn’t matter here, either should work fine.
Step 4: Cut out your photos.

Leave your photos taped to the cardstock while you cut them out to make it easier.
Go slowly and use sharp scissors to cut your photos out with success.
Step 5: Apply Mod Podge to the wood slice.
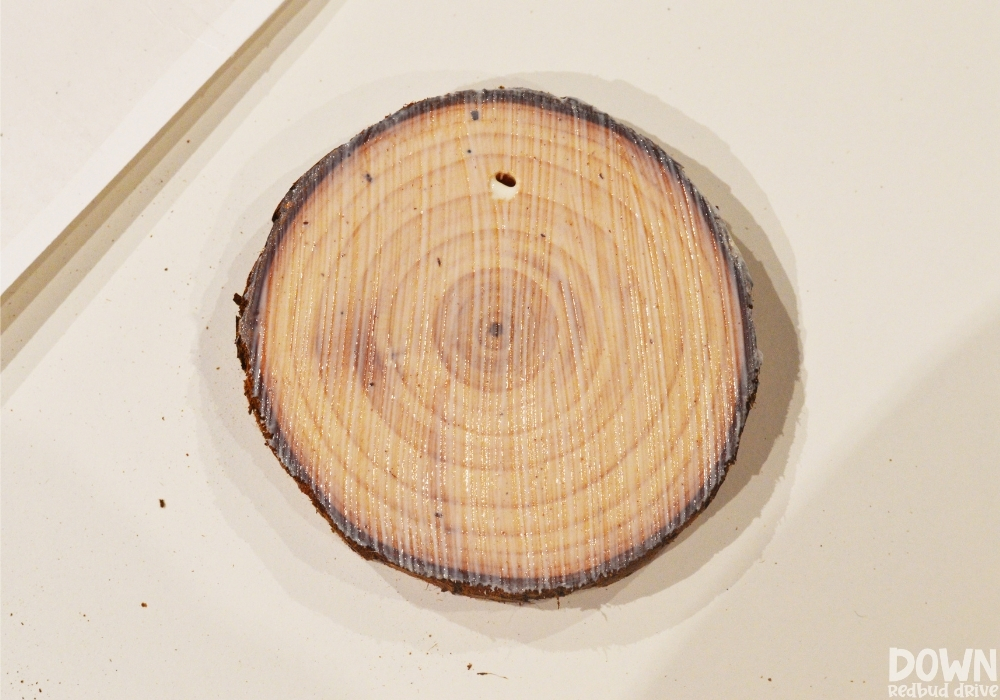
Use a foam brush and apply an even coat of Mod Podge to your wood slice ornament as shown.
Step 6: Place your photo onto the wood slice.

Carefully place your tissue paper photo onto the Mod Podge covered wood slice ornament.
Keep the hole placement of the ornament in mind as you lay the photo down. You want the hole at the top center so it hangs on the tree correctly.
Use your fingers and carefully press the photo down onto the Mod Podge to avoid wrinkles in the photo.
Step 7: Apply another layer of Mod Podge.

Use the foam brush to apply another even coat of Mod Podge to the top of the DIY photo ornament.
Then use a toothpick to press into the ornament hole at the top.
Use your thumb to press around the outsides of the wood slice to remove any excess paper that may be overlapping.
Using your thumb to do this, and not scissors, will ensure a natural edge and make it blend into the wood better.

As they’re drying, this is what they will look like.
Wait about an hour for them to dry completely before moving onto the next steps.
Step 8: Add the ornament hanger.

The wood slices I got were from Amazon and came with this adorable twine, so I used it to make my hangers as shown.
Step 9: Add decorations to the top of your DIY Wood Photo Ornaments.

I used a hot glue gun and added a little bit of adornment to the tops of each ornament. This is optional, so if you like them plain, leave them that way!
Want more DIY Christmas ornaments?


- Feather Ornament DIY – They’re easy, and the end result looks so high-end no one will believe you made them!
- Napkin Ornament DIY – These ornaments are so easy to make and they turn out so very cute!
- Santa Seashell Ornament DIY – These ornaments are the perfect way to bring the beach to your Christmas tree!
Pin this for Later


I’m going to try these tomorrow. Can I use tracing paper rather than tissue paper? Thanks!!
Hey Sandy! If your tracing paper isn’t waxed it should be fine, otherwise I’d try to find some tissue paper. Hope that helps!
does it matter if the pictures are printed with an ink jet or laserjet printer?
Can you ask which of the wood circles you got from Amazon from The link above?
It should be the ones automatically selected, but I shoot for a circle size of like 2″ – 2 1/2″. Hope that helps!
Hello!
Cannot figure out how to use this link. Said it’s been used several times and cannot be used again. Tried making 2” photo frames and have no clue how to make the picture fit into the “circles”
Please help! Thanks!
Oh no! I need to reach out to them to see if they can do something for me since so many people are using it. Make the frames 2.75″ (I checked the dimensions again) and then when you upload the pics, just drag them into the circles, they will automatically fit to the circles. Hope that helps!
Hello! I have tried to click on the link but it says I do not have access and that it’s been shared with too many people! Help!
I’m sorry! I’m reaching out to Canva to see if they can make sure I can send it to more people. But until then, you can just make photo frame circles in Canva that are 2.75″. Upload your photos, then drag them into the circle photo frames.
I can’t get the template to work either! love the idea! trying to figure out how to make it work..
Thanks!
I think I have resolved the issue. I have updated the link and instructions and it should be working now. I think Canva changed how their links worked. Let me know if that works!
Help!!! I’ve been trying to make this exact project for days and I can’t figure out how to size my pictures correctly. I looked on your link but there’s no pencil to edit how do I go on Camera and make the correct size template?
I just make 2″ circle photo frames in Canva! Resize and see if that works!
I updated the link and instructions and that *should* work now. Let me know if it doesn’t! Sorry about that!
Hello!! Great job!! They look excellent!! I was wondering if you could tell me the name of the canva template you used as the link isn’t working sadly. Thank you so much!!
Hey! I checked the link, and it’s working fine here! It doesn’t work well on mobile, so if that’s what you’re using, try desktop instead. Click the link, then click the pencil in the bottom right corner that says, “use template”. Hope that helps!
Hey there!
I know there has been an issue with the link due to exceeding 100 people, but how do I find the template on Canva’s website itself?
I just created it! You can easily just grab a circle shaped frame in Canva, stretch it to the size you need for your wood shapes (it will show you the size as you increase or decrease the size), and then duplicate the shape on the page for as many as will fit. Hope that helps!
I reached out to Canva, but they didn’t have a real solution for us as far as the 100 people.
Hello! Was anyone concerned about jamming up their printer using this technique? I think these are so cool, just worried about the tissue paper in the printer.