
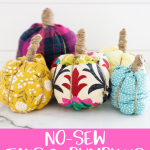
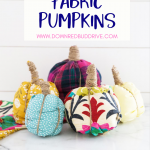
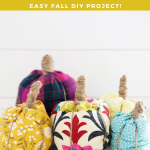

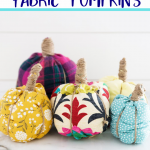

These adorable No-Sew Fabric Pumpkins are the perfect fall DIY! They’re great for kids or adults to make, and you’ll love how easy it is to customize these pumpkins. Use leftover fabric scraps and just a few basic supplies to make this charming project in just an afternoon!

Fall is probably my favorite season. Fall decor can stay up for three months, and there are so many awesome ways to decorate. Our house has some pretty crazy colors, so it’s nice to be able to customize my decor to be exactly what I want (so it doesn’t stick out like a sore thumb in our house)!
These DIY No-Sew Fabric Pumpkins are one of my favorite projects to make because they can use up all those hundreds of scraps of material I have (like the leftover fabric from doing these easy beginner curtains, and my barstool makeovers that I’m obsessed with), and because they take no time at all.
DIY No-Sew Fabric Pumpkins {VIDEO}
You will adore these fabric pumpkins once you get started, and then no scrap fabric will be safe! If you’d like me, you’ll start shopping at thrift stores just to find cool shirts to convert!
Before we get into the details, here is a quick video of the process so you can see it from start to finish!
Supplies
You’ll need just a few things to make this project!
- Long-Sleeved Shirt or Fabric
- Scissors
- Rubber Bands (two per pumpkin)
- Poly-Fill Stuffing
- Twine
Step 1: Select your fabric.
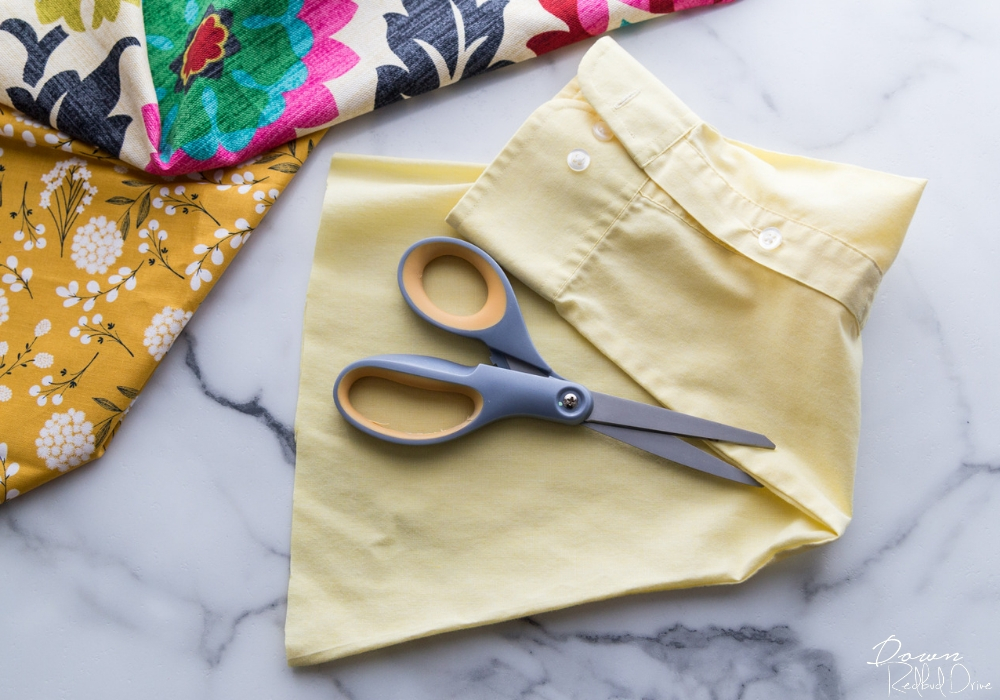
The easiest way to make these, and the way to make them no-sew, is by using an old shirt sleeve. I went to the thrift store and found several awesome button-up shirts in fun colors for SUPER cheap to use just for this project. Cut it right before the armpit in a straight line, and then cut somewhere before the wrist.
FOR NON-SHIRTS: If you have some fabric that you want to use, you can sew a piece of material together with the right sides together. Only sew the one edge (think cut shirt sleeve) and that’s it. Basically, you’re making a tube!
Step 2: Measure and cut the twine.
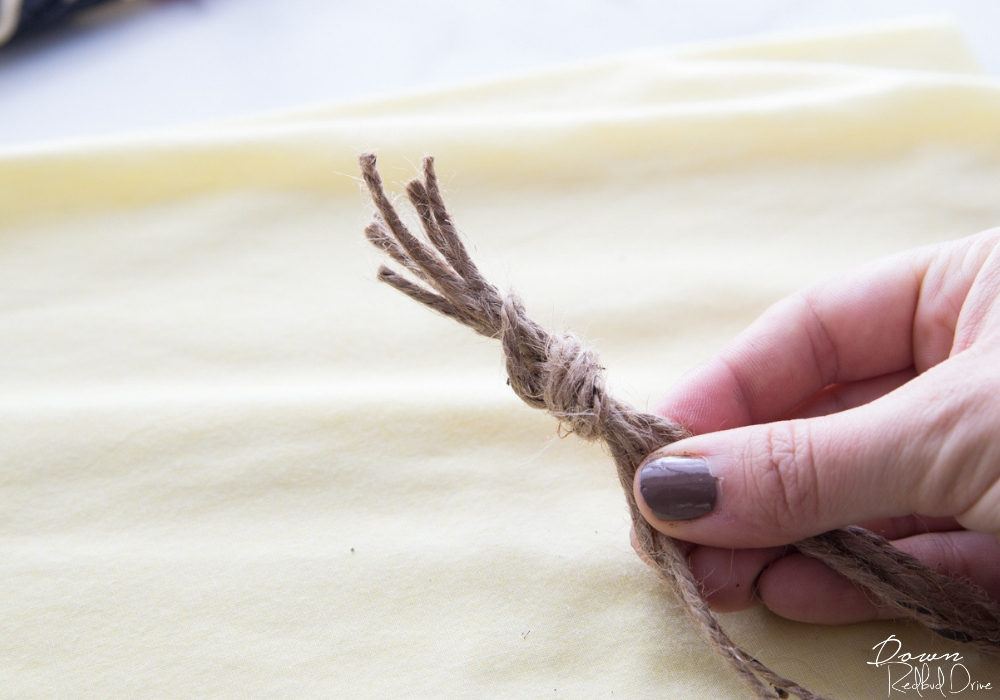
Next, you will need to measure out your twine. You will want it to be about 6″ longer than your piece of material. Cut six strips of twine at that length for each of the DIY No-Sew Fabric Pumpkins you’re making.
Tie your six strips of twine into a knot like shown. Don’t trim the edges, as it won’t matter once the pumpkin is finished.
Step 3: Secure the twine.
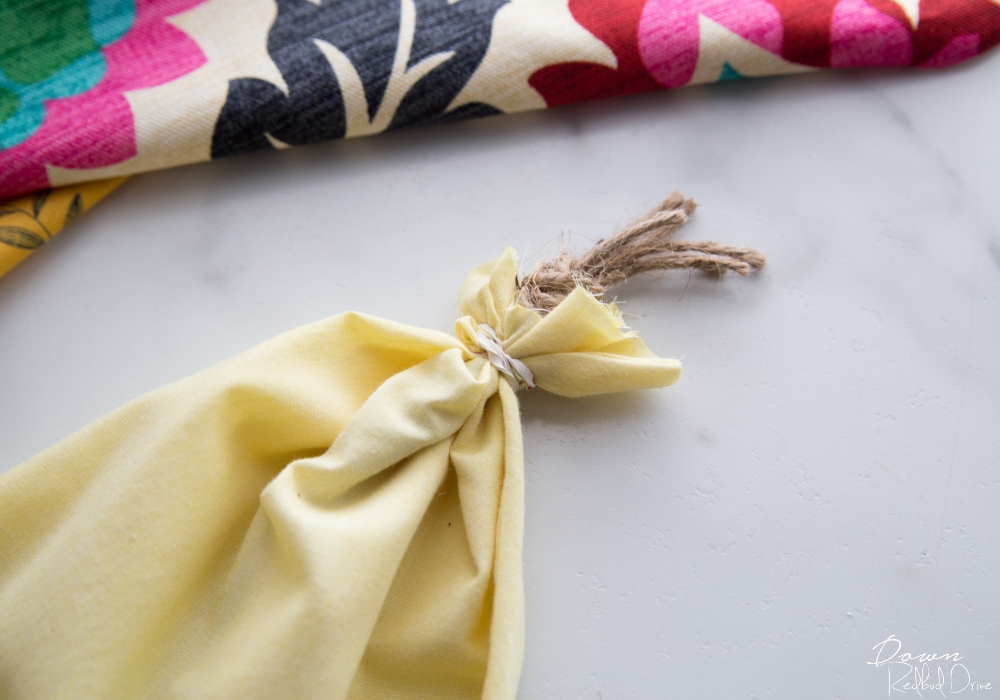
Turn your material inside out. Slide the knotted twine through the middle of the material, and stick the knot out the other side.
Use a rubber band, and wrap it under the knot. This will hold all the material together. Make sure it’s tight.
Step 4: Stuff your No-Sew Fabric Pumpkin.
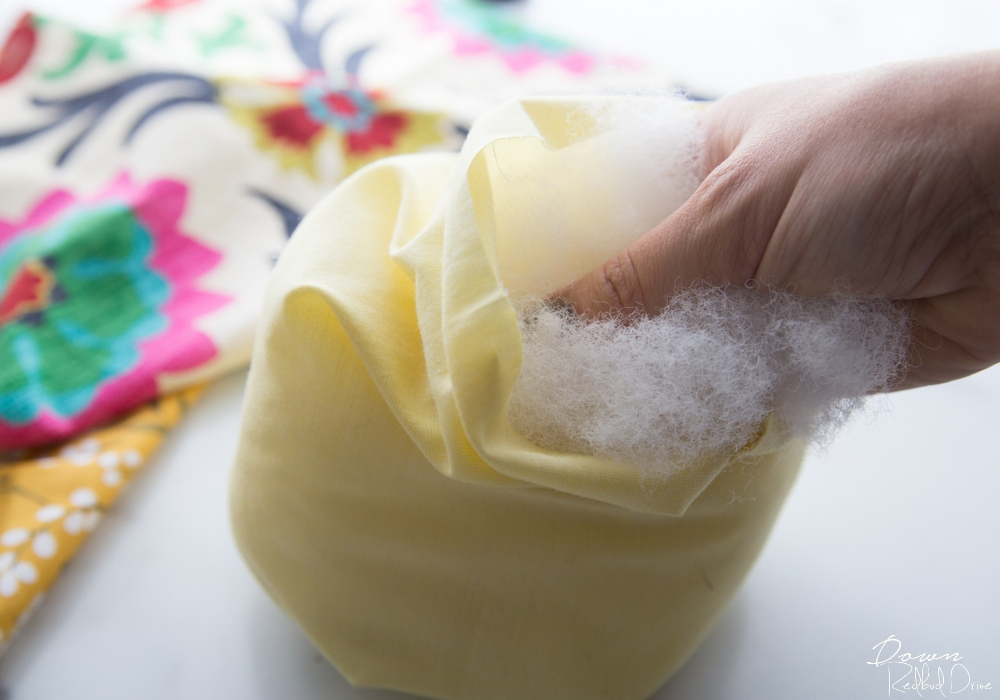
Flip the fabric back right side out with the twine knot inside. Fill it full with the poly-stuffing. Really fill it full. Press the filling in pretty tightly. Leave room at the top to rubber band it all together.
Step 5: Separate the twine.
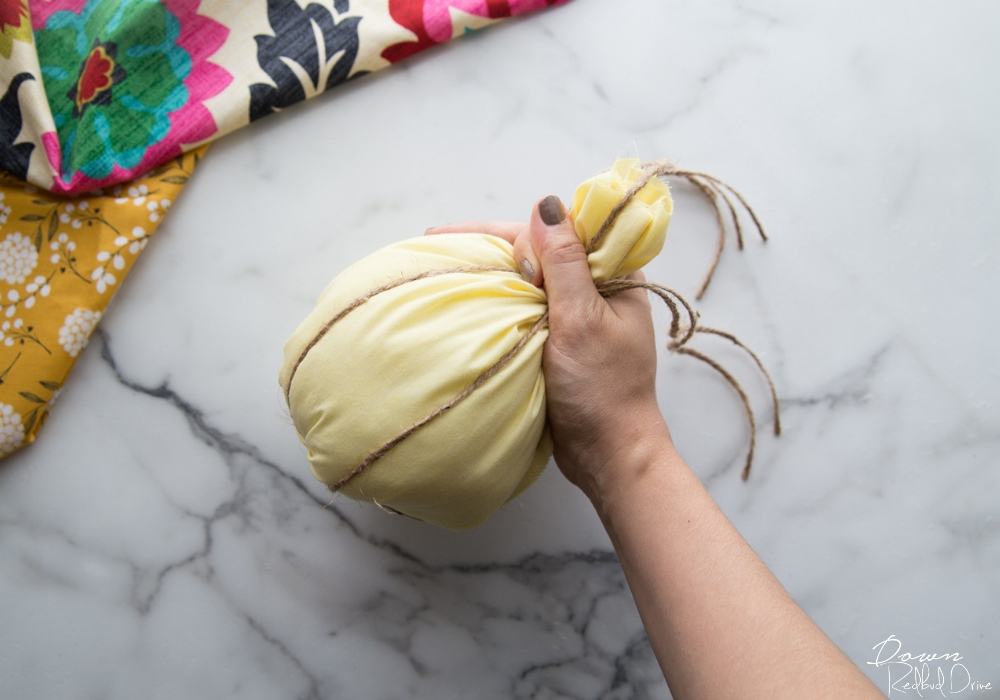
Spread your twine strands out evenly, and then pull them up into the fabric bunch and rubber band it (think like you’re doing a ponytail).
Step 6: Make the pumpkin shape and stem.
Once the rubber band is on, pull the strands a little tighter so they make the indentations on the fabric like a pumpkin.
Take two strands of the twine and criss-cross them back and forth around the bunched fabric. Then tie them once they’re short and trim the edges. You can do this with all the strands, or just 2-4 of them. There’s no wrong way to do it. Watch the video above if you’re unsure how to do this step.

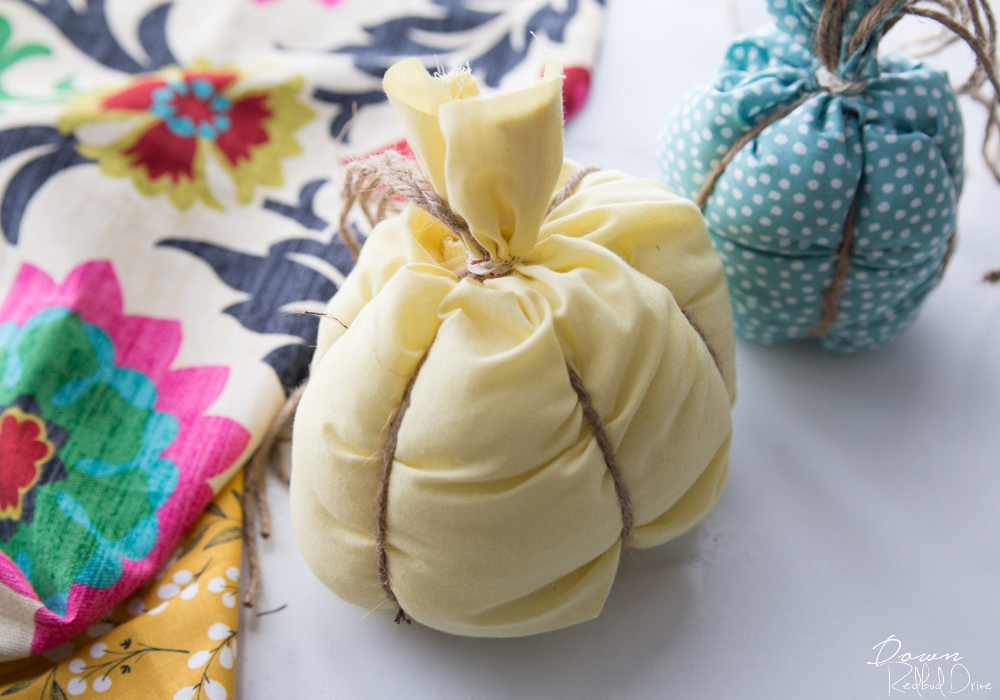
That’s it! That’s all it takes to make DIY No-Sew Fabric Pumpkins! I love mixing up the colors, textures, and sizes of the pumpkins so I have a variety. If you make some pumpkins using this tutorial, I’d love to see them!
Even More Fall DIYs!
- Embroidery Hoop Pumpkins – Use some fabric and make these adorable embroidery hoop pumpkins!
- Mason Jar Lid Pumpkins – These are made using mason jar lids and washi tape, and they’re ADORABLE!
- Pumpkin Spice Latte Candle – This candle smells just like a Starbucks PSL!


How cute and easy! Thanks for sharing this!
Thanks! They’re so much fun to make!