

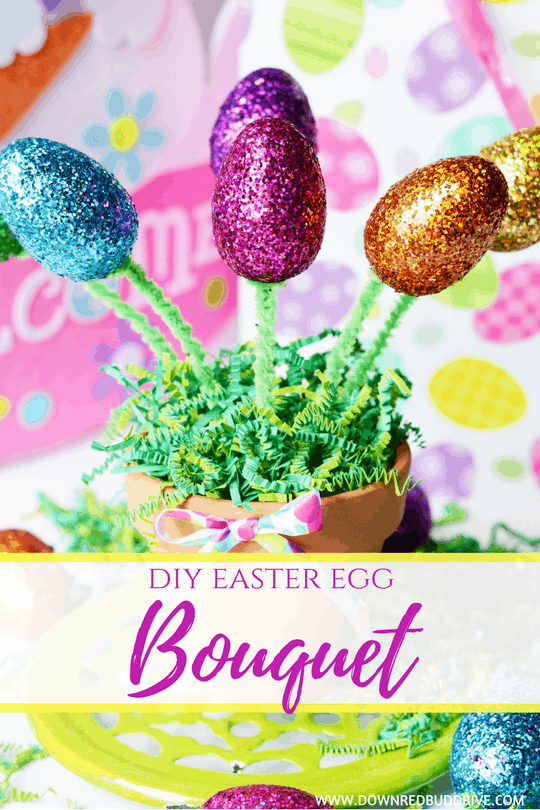
Turn those plastic eggs into an adorable Easter Egg Bouquet! Great for decor, or as an Easter Basket alternative or Easter gift idea!
This post may contain affiliate links. If you use them, you’re helping to support this site in a small way, and we appreciate that! See our full disclosure policy HERE.
I am SO happy with how this Easter Egg Bouquet turned out! It’s bright, colorful and GLITTERY (that’s the best part) and totally outside the box of normal Easter stuff. The best thing is there’s no gluing, sewing and heavy prep. It take like 10 minutes to put together and it looks fantastic!
The options for this Easter Egg Bouquet are pretty vast. You could use it as decor around your house, or you could use it as an Easter Basket alternative for older kids, or even as a cute Easter-themed gift (I’m thinking nursing homes, grandma’s house, secret sister gifts etc). You can leave the eggs empty, or put lightweight items in them like stickers, money etc.
IF YOU LIKE DIY GIFTS, CHECK OUT THIS YEAR OF TOWELS GIFT IDEA!
Easter Egg Bouquet
You will need:
6″ clay flower pot
Floral foam
Green pipe cleaners
Green paper Easter basket grass
Plastic Easter eggs
Ribbon (optional)
Filler items (optional)

First, you need to cut a piece of the foam to fit into the pot. You want it to sit like 1/2″ below the top of the pot. I smashed mine in there until it sat where I wanted.
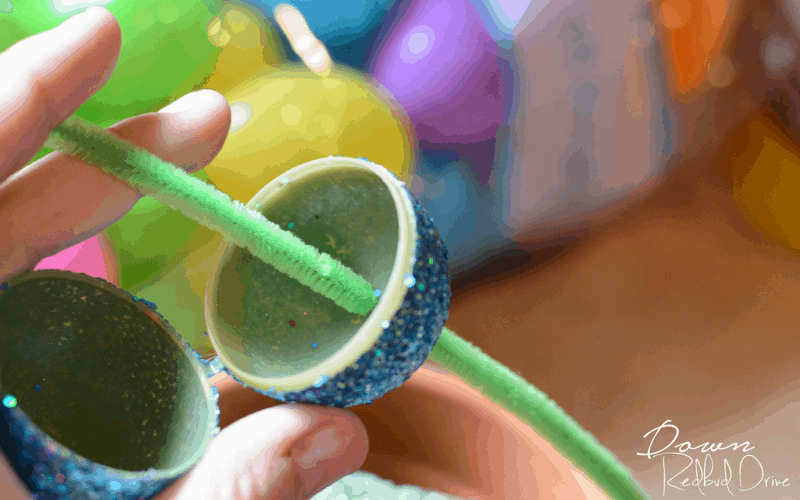
Next, stick a pipe cleaner through one of the holes on the bottom of the plastic eggs. Pull it up about halfway through.
FOR MORE EASTER IDEAS, CLICK HERE!
Then run it through the hole next to it. It should look like this when you’re finished. Try to make the ends line up so they’re the same length.
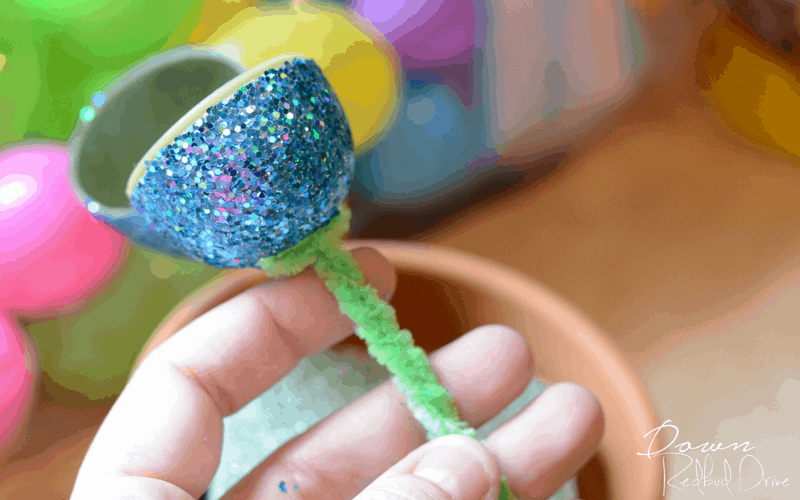
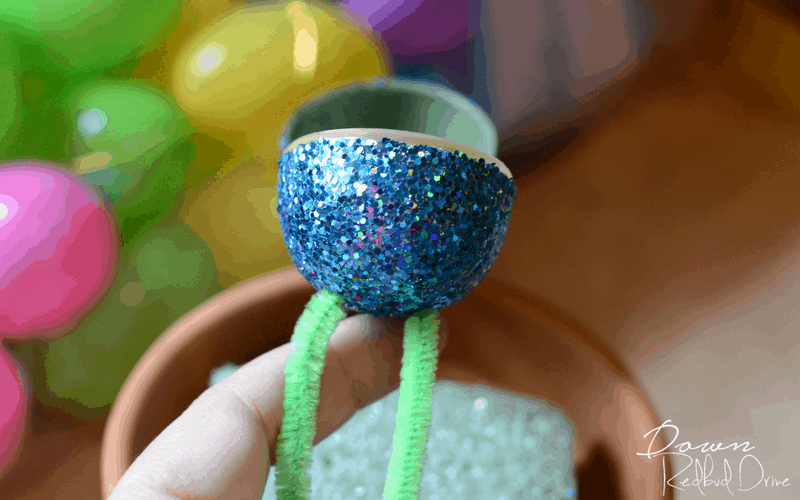
Pinch the two wires between your thumb and forefinger and twist it together tightly. Twist all the way down, to make the stem for your Easter Egg Bouquet flowers.

I bought some cheap sheets of stickers, and just fut them up into sections that would fit into the eggs. You could do lots of different things if stickers aren’t your thing.

Stuff your eggs BEFORE adding them to the foam. It makes it easier. Stuff them with lightweight items like stickers, dollar bills, or something very light. Otherwise your eggs will droop, and won’t be very flower-like.
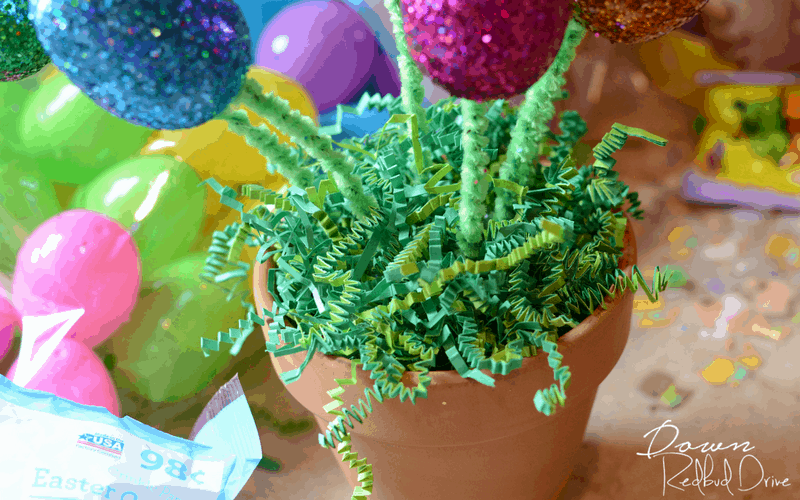
Next, you will need to stick your flowers in the foam by the stems. I trimmed the very end of the stems off with scissors to make them even. Press them into the foam gently, but firmly. Six eggs fit into this pot nicely with three in the back, two in the middle, and one on the front. The longer the stems, the bouncier they will be. After a few days, they may begin to droop from the weight of the eggs, so you spruce them back up by re-straightening the pipe cleaner stems. Alternatively, you could make the stems shorter and not have to worry about that at all. Add the grass to cover the floral foam. I just pressed it in there, and didn’t glue or anything. It looks fine!

I decided to tie a little bow with satin ribbon and glue it on the front to finish it, but it’s optional. If you don’t want glitter eggs, you can use any kind of plastic easter egg you want. Regular eggs, camo eggs, character eggs, etc! The stores are full of all kinds of neat ones! Get the glitter ones I used HERE!


Leave a Reply