
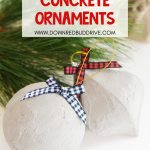


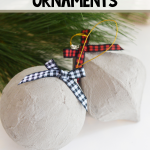


These DIY Concrete Christmas Ornaments will be the most simple DIY you’ve ever made! These lightweight ornaments have all the look of concrete without the weight!
This post may contain affiliate links. See my full disclosure policy HERE.
Christmas ornaments are one of my favorite things about Christmas decorating! I change the theme of my Christmas tree every year, so I end up making a lot of my own ornaments if I can’t find what I want in stores.
That being said, I LOVE the look of concrete decorations for Christmas, but it’s basically impossible to get that look in an ornament. Concrete is heavy and unless you have a super expensive and durable tree, it won’t hold even a small concrete ornament.
So, I came up with a solution that works wonderfully. All the look of concrete without the weight! These are INCREDIBLY cheap to make, and take very little time or crafty skill!
I’ve made several ornaments and posted the tutorials if you want to check those out as well! I’ve made feather ornaments, Santa seashell ornaments, personalized photo ornaments, wood slice snowman ornaments, regular snowman ornaments, pom pom ornaments, doily ornaments, and even ballerina ornaments!
How do you make these DIY Concrete Christmas Ornaments?
Step 1: Gather your supplies.
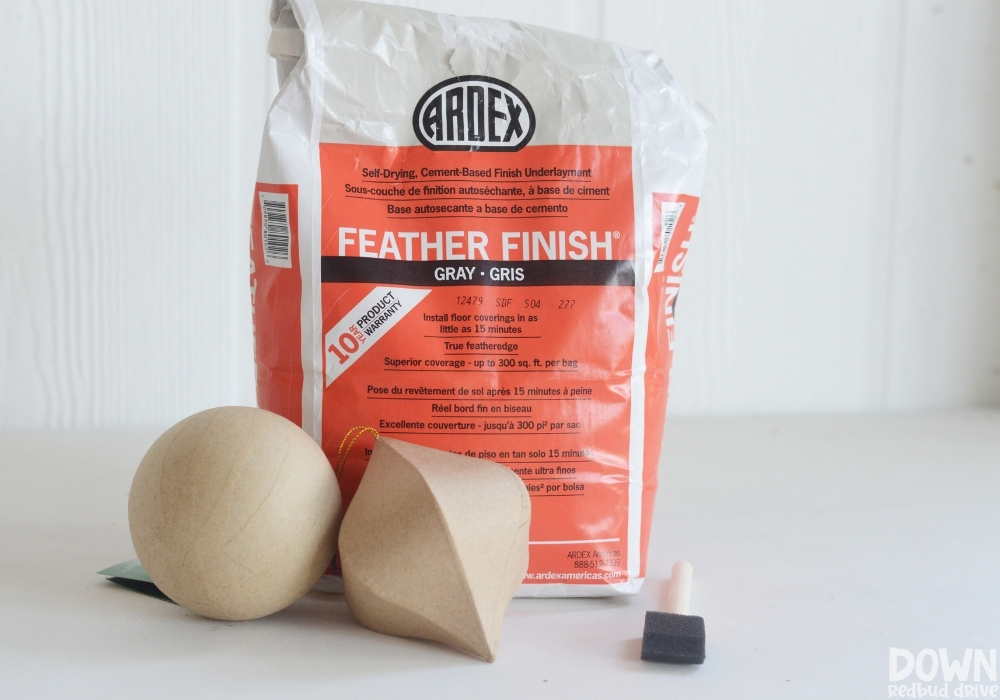
You will need:
- Fine Concrete (this is the kind I use)
- Paper Mache Ornaments (I find mine at Hobby Lobby for $1)
- Foam Paintbrush
- Disposable Cup
- Water
- Filigree (for the ornament cap)
- Epoxy
- Ribbon (optional)
Step 2: Mix the concrete.

You can use the directions on your bag of concrete to get the consistency you want, or you can eyeball it like I did.
You will want it thick, and not too runny for easier application. You don’t want to soak the paper mache ornament, or it will get too wet and your ornament hanger can pop out.
Step 3: Paint the concrete on the ornament.
Use the foam brush and paint on a layer of concrete to your paper mache ornament. You can find these ornament forms in all shapes at Hobby Lobby, and if you wait until they’re 50% off, they’re only $1 each!
Let the first layer dry on your DIY Concrete Christmas ornaments completely, and then add a second layer on top of it to cover any gaps in coverage. Two coats worked best for me, but if you feel three coats will be better, then you can do that. Each layer is so thin that three coats won’t make the ornament too heavy even remotely.
Pro Tip: Hang your ornaments to let them dry between layers. Be sure not to get the paper mache too wet, or it will pull the ornament hanger out of your ornament while drying.
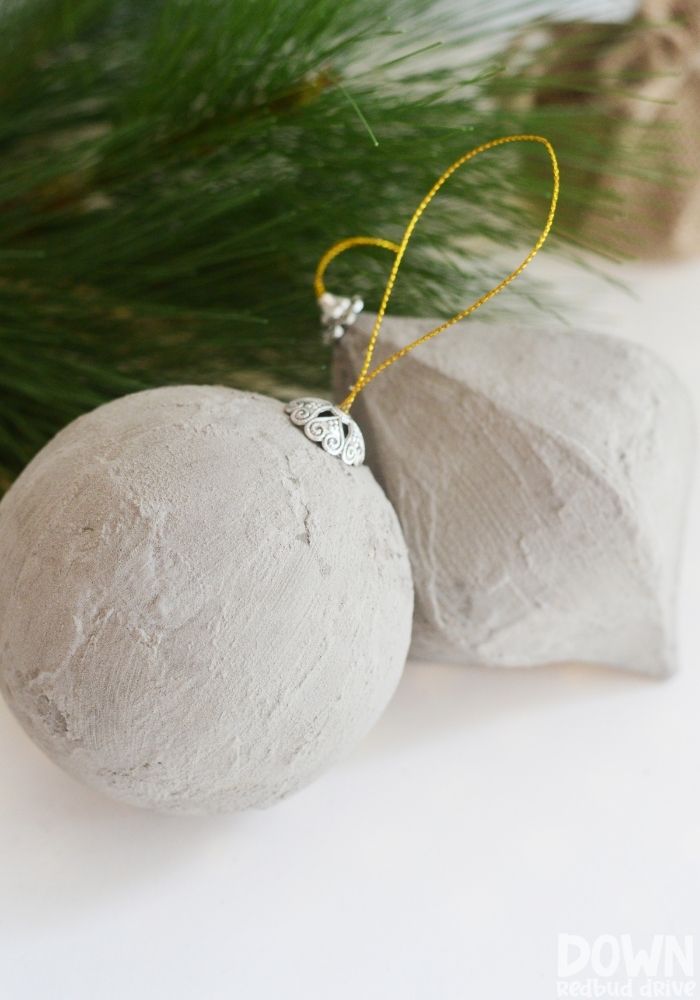
Step 4: Add the filigree and optional ribbon.

To elevate the look of your DIY Concrete Christmas ornament and take it from looking handmade to high-end, you can add a filigree to the top of the ornament.
I used these filigree pieces. I ran the hanger through the filigree and used E6000 epoxy to attach it to the ornament. Let it dry for a full 24 hours to ensure the epoxy has cured completely.

If you want to add a pop of color or another element of design, you can add a bow in the color or pattern of choice and hot glue it on.
I love the look of these DIY Concrete Christmas Ornaments with the buffalo plaid ribbon!
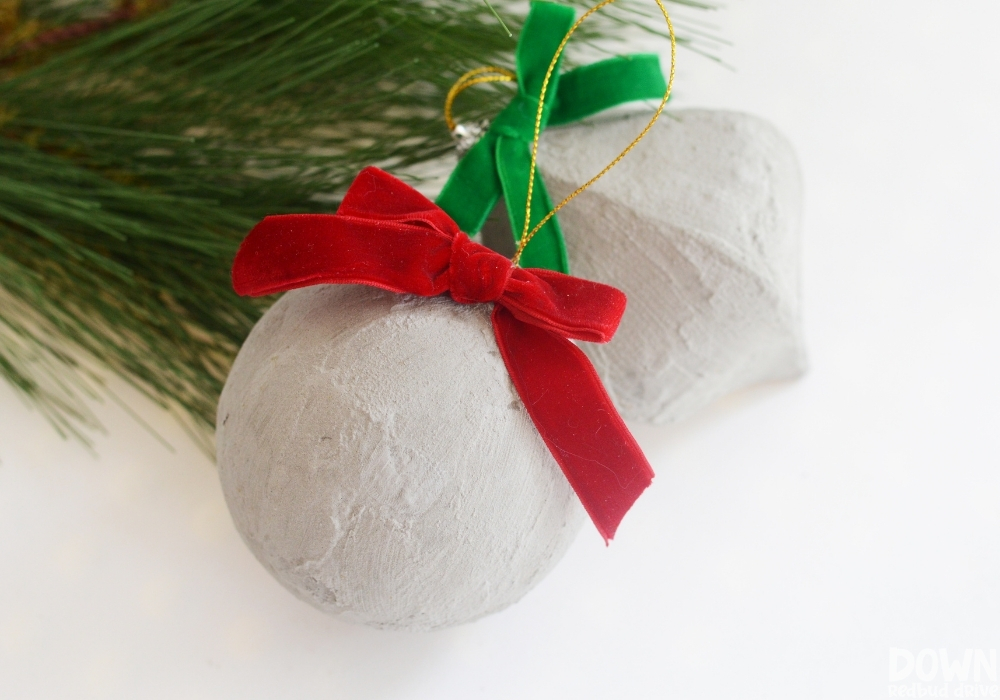
The old-fashioned velvet ribbon has a soft spot in my soul for Christmas decorations though! This in a dark maroon or a navy would also have been beautiful to me!

Want more DIY Christmas ornament ideas?


- Snowman Ornament DIY – This adorable Snowman Ornament DIY is super cute and is so simple to make!
- Santa Seashell Ornament DIY – Bring the beach to your Christmas tree this year with this easy-to-make Santa Seashell Ornament DIY!
- How to Make a Napkin Ornament – In just a few minutes, make a napkin ornament that will be one of your new favorite Christmas crafts!
- Mason Jar Lid Ornaments – Upcycle old cards to make these adorable mason jar lid ornaments!
These DIY Concrete Ornaments are the perfect way to add concrete Christmas decor to your tree!


Leave a Reply