
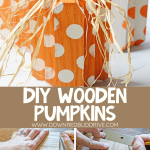
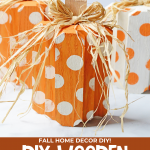

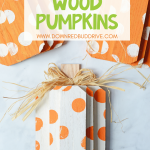


This adorable Wood Pumpkins DIY is the perfect easy fall home decor project you can complete in just an afternoon! Make them for your house, give them away as a gift, or make them to sell! Customize the colors and designs to fit your decor, or make them just like the example!

Pumpkins are my go-to for fall decor. They’re cute and not Halloween-focused, so I can leave them up all season long. It’s so fun to make pumpkins using different items or mediums like the concrete pumpkins I made, fabric pumpkins I made, or even the embroidery hoop pumpkins I made!
Easy DIY Wood Pumpkins
This easy DIY decor project is perfect for decorating the porch, putting on your mantel, or even selling on Etsy! You can paint them in all different colors to customize them to your style, or personalize them for gifts.
Step 1: Gather your supplies.
You will need:
- Boards – I specifically used oak (you could also use pine) boards that were 5.5″ wide x 1″ thick, which I got at Lowe’s.
- Wood for Stem – I specifically used an oak piece that was 1.5″ wide x 0.25″ thick (see pic below). I got it at Lowe’s.
- Saw to cut the boards*
- Wood Glue
- Acrylic Paint
- Raffia
- Hot Glue Gun
- Paintbrushes
- Foam Dotting Brush (optional)
* You can have them cut the boards at the lumber store where you purchase the wood, if needed! While the cuts may not be completely accurate, they will be close enough for this project. Plus, it’s free!
Step 2: Cut your boards.

I wanted my pumpkins to be 7″ tall, so that’s what I cut my boards to. If you are using the 5.5″ wide boards like I did, you will need to cut (2) 7″ long pieces for each pumpkin you make.

To make it easier on yourself, I just cut one 7″ piece and then used that as my measuring stick to make sure each of the additional pieces was exactly the same length as the first.
For each pumpkin you will need:
- (1) 5.5″ wide piece
- (1) 3.5″ wide piece
- (1) 2″ wide piece
The reason for these measurements is that my boards were 5.5″ wide. So I just had to make a single cut to get my 3″ and 2.5″ pieces. Efficiency at its best!
Step 3: Create the rounded corners

I measured mine at 0.5″ and cut that amount off each corner of each board.

When you’ve cut off all the corners for your Wood Pumpkins DIY, this is what the pieces will look like. From here, you can give them a quick sanding to reduce the rough edges and make painting easier. I didn’t do it for this set, so it’s up to you!
Step 4: Cut the stem.

Use the smaller board you got to cut the stems. I cut mine at 3″ in length, but you could make yours shorter or longer depending on your preference.
Step 5: Glue the pieces of the Wood Pumpkins together.

I used Gorilla wood glue, and just put a liberal amount on the smaller pieces, lined them up, and pressed them on top of the biggest wood piece.

This is what they will look like when you have all the wood pieces glued together.
Step 6: Glue on the stem.

Next, I put a little wood glue on the stem piece and glued it to the back center of the Wood Pumpkins.
Allow these to dry for a long time to ensure the glue is cured before moving on. I just did these in the evening and let them set up overnight.
Step 7: Paint your wood pumpkins.

Here’s where it gets fun! Choose the color you want your pumpkins to be! You can do orange, cream, white, or even a soft sage green.
If you want to have fun with it, mix it up and do a teal or pink!
I just used cheap acrylic paint you can find at Hobby Lobby or any craft store. I will be using these strictly indoors. However, if you wanted to make them outdoor-ready, you could clear coat the finished product with clear spray paint.

I used a foam dotting brush and added polka dots to mine. This step is optional, so do it or don’t, depending on your preference.
If you choose to add polka dots, wait until the base coat is totally dry before adding them.
Step 8: Add a bow.

Once your paint is dry, you can add a bow to your finished product! Adding the bow really gives it a finished look to me. Use raffia like I did, or add a cute ribbon instead. Attach with hot glue and you’re done!
That’s all you need to know to be able to make these cute Wood Pumpkins! They’re very easy, and come together pretty quickly! They stand up nicely and look great sitting on my bookshelf in my living room!
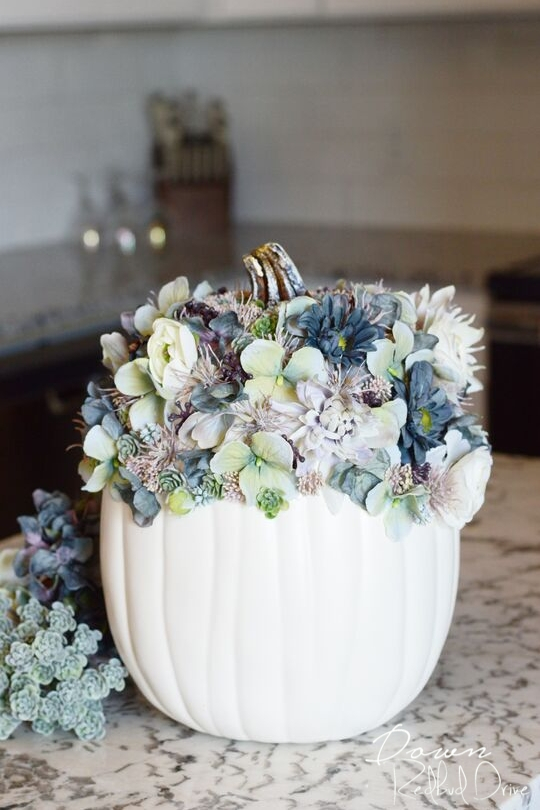
More pumpkin-themed DIY projects!


- DIY Concrete Pumpkins – These pumpkins are super unique and turn out so very cute!
- Floral Pumpkin DIY – Add a feminine touch to your fall decor with this simple floral pumpkin DIY.
- Canning Ring Pumpkins – These canning ring pumpkins are super easy to make and they look amazing!
Whether you make these DIY Wood Pumpkins for yourself, for someone else, or even to sell, I know you’re going to love how they turn out!


Leave a Reply